Step By Step Tutorial
Configuring PopNotifi is very easy and generally takes less then 5 minutes. This tutorial will guide you through the whole process of configuring PopNotifi for your website.
After you signup/login, you will be brought to our dashboard.
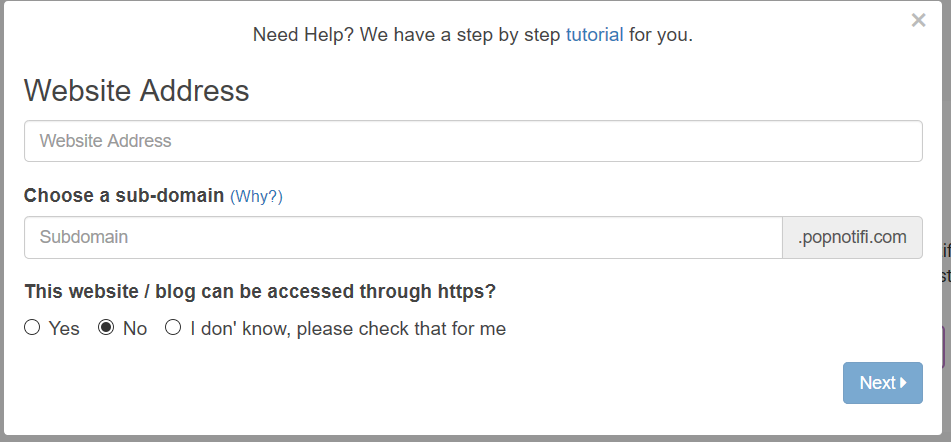
In order to use PopNotifi on your website, you will have to first add your website in PopNotifi dashboard. Adding your website is a very simple process, we collect few pieces of info from your end and you are done. Click on the Continue button in Web box. It will bring up our new website dialog box.
Website Address: The address where your website is located at, please enter the address without http:// or https://. E.g. abc.com
Subdomain: If users access your website without https, they will have to go through a subdomain on PopNotifi to register for notifications. You can choose a subdomain that reflects your business.
Https Access: If your website can be accessed through https, please select yes, otherwise select No, if you are unsure about it, you can click on “I don’t know” and it will automatically check that for you.
Clicking next will open general info dialog.
Icon: Icon is optional, but it is highly recommended that you upload an icon which reflects your business or brand.
Title: The name or title of your website.
Google Push API Key: By default PopNotifi uses our default parameters for sending notification to Google Chrome, but it is recommended that you add your own. You can get yours for free form Google (This can also be done later by Going to Settings).
Apple Safari Configuration: Notification in Safari require notifications to be signed by a certificate. For that certificate you need an Apple Developer account which costs $99/year.
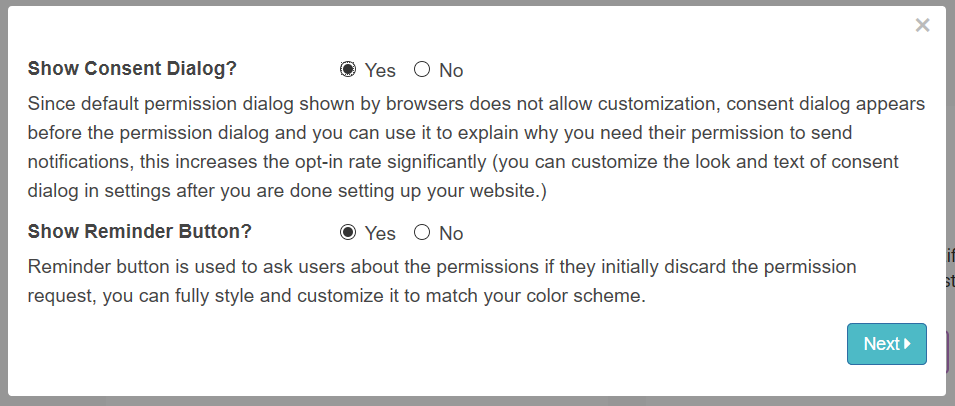
Clicking next will bring you to consent dialog configurator.
Consent Dialog: Browsers are very stubborn when it comes to push notifications. Generally to prevent web admins from abusing the service. So they don’t allow us to customise the default permission window that opens. We have observed that opt-in rates significantly increase if you explain to user why you need to send them notification. This is when consent dialog comes into play. Before showing the default permission dialog, a modal dialog will appear in the webpage explaining to them why you need to send them notifications.
Reminder Button: Reminder button is a small icon which appears in the bottom left or bottom right of your web page. Reminder Button is used to track the permission status of users. If they initially decline the permission request, they can use the Reminder Button to grant permissions. (Reminder Button is also customisable from Styles tab)
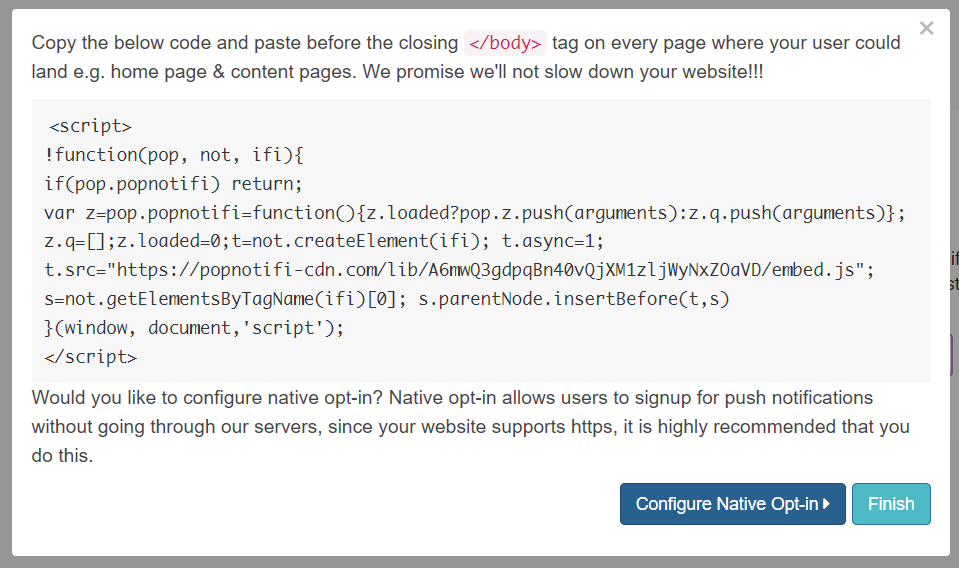
Clicking next will bring you to your embed code which you need to add into your webpage. You will have to add this into every page you want to enable PopNotifi on (before closing </body> tag). If you are running a WordPress, OpenCart or Shopify website, you can use our dedicated plugins to add the code automatically.
If your website does not support HTTPS, this is all you need to do and you can stop here (click finish button and you are good to go). But if your website supports HTTPS please read further because it is highly recommended that you configure native opt-in for better subscriptions.
Native Opt-in for HTTPS Websites
If you clicked Yes for the HTTPS option in the first dialog. Instead of the dialog shown in above, you will be seeing the following dialog.
Click Configure Native Opt-in to open the native op-in configuration.
In addition to the embed code you added earlier, you will have to add one additional line of code in head element in your html document (if you are using our plugin for wordpress, go to settings and enable native opt in tags option). After you click on the blue “Click Here” link, it will download a zip, these are our helper files that you need to upload in the root of your web server (generally public_html). After that click on verify button so that our server could verify that those files are publicly accessible. Once the verification is done a finish button will appear. You can click on it to finish the website setup.
Last updated

